Vista - partition hard drives (enlarge / reduce)

For the first time it is possible to enlarge and reduce partitions under a Microsoft system without additional software. This allows you to divide the hard drive into multiple partitions. Simply with on-board resources. A sensation when you consider that Microsoft needed years for this implementation and that this one (of many) new function can of course also be paid for dearly. Well, after all, the added value has to come from somewhere.
Partitioning the hard drive under Windows 7
Table of Contents
But to the point:
If you want to carry out this tip, you have to be logged in as administrator, or you inform the program about this with your password or a confirmation when prompted.
All of the following actions are carried out in the computer management, these can be reached via
Start> Control Panel> System and Maintenance> Administrative Tools> Create and Format Hard Drive Partitions
Alternative:
Start> In the search field: "Control Panel" and then like the last line
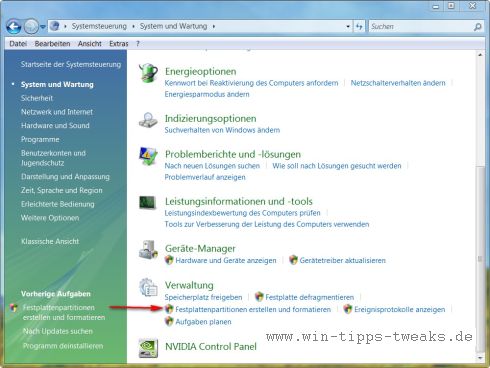
And you're already in the Disk Management.
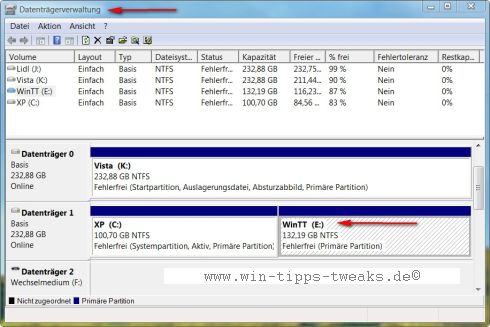
For this tip, I have a primary partition that was removed from my 2. Hard disk (C) was created with the name ??WinTT (E)?? made available and will do that for you Experimental shrimp Play to see if Vista’s promises hold true.
1. Shrink an existing partition
You go with that now Cursor* on the selected hard drive/partition WinTT(E) and right-click to reach the following context menu
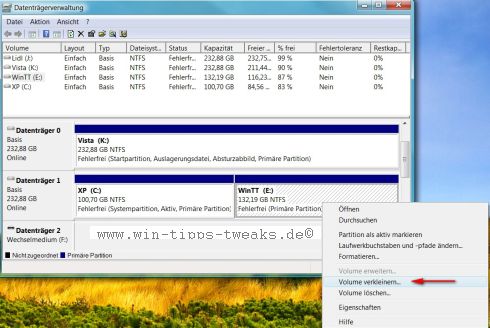
Select the option here decrease
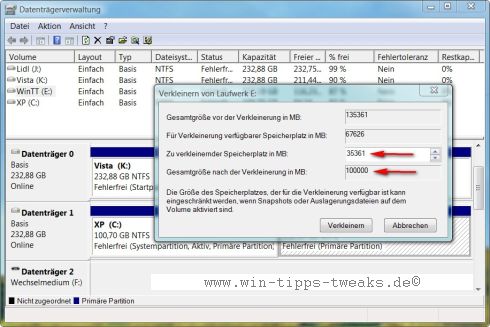
In the following menu you can specify exactly how big the partition should be in the future. I will now select a downsizing as an example 35361 MB.
So stay as a result 10000 MB left over.
The result looks like this:
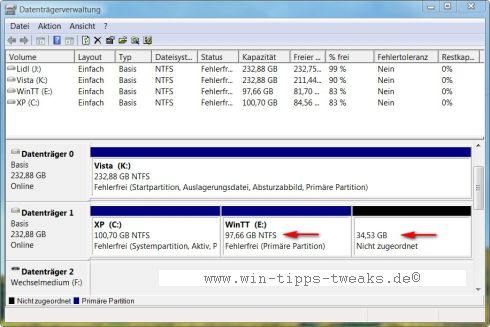
WinTT (E) now has a size of 97,66 GB and there is a new partition with a size of 34,53 GBwhich, however, has not yet been assigned.
In order to be able to use this new partition, I have to assign it to the system and set it up, of course.
Right-clicking on the volume brings me to the following menu:
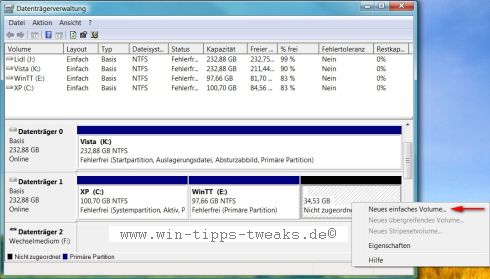
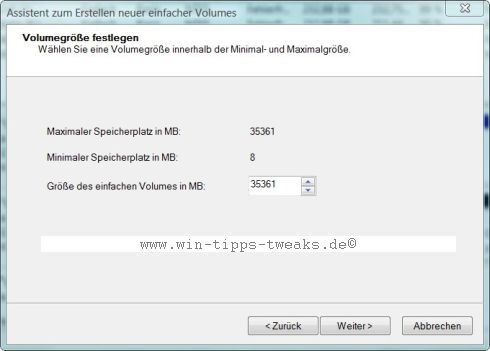
Where do I get a new one ??Simple volume“can create. After confirmation, I again have a choice to set the size. For simplicity, I'll stick with the suggested size and just confirm the dialog.
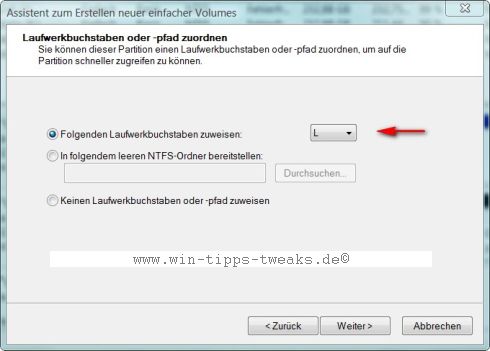
We continue with the drive letter, which can be set individually.
Now you can File system and the type of formatting establish.
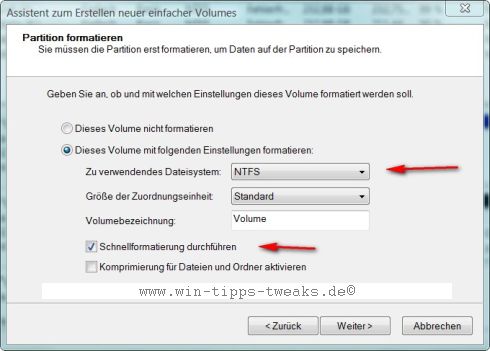
I choose that Quick format and NTFS file system.
These settings are up to you, since a profundity of the setting options would go beyond the scope of this article.
In the following dialog box, you will be informed about the options you have chosen
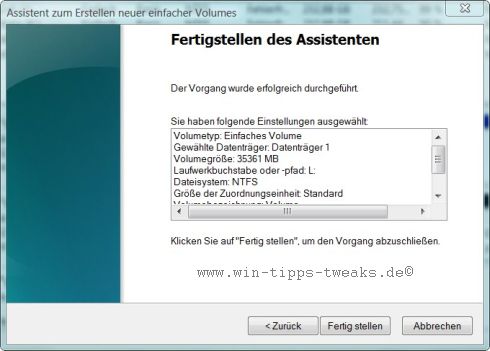
You can reconsider your settings, undo or simply confirm.
I have confirmed and now have that Volume L available.
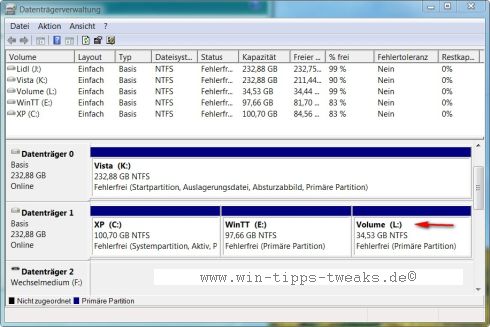
This volume can now be used as normal for further work.
2. Enlarge partition
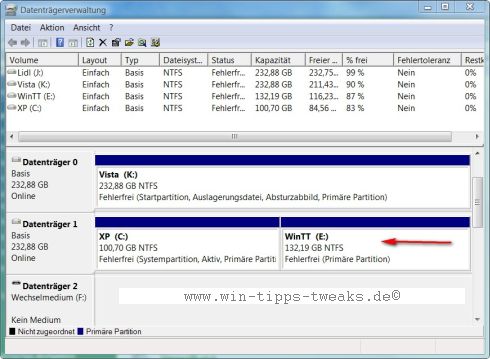
Logically, what can be made small can also be enlarged. But you can only enlarge the partition that you have reduced with the tip above. In this example, I've shrunk my main hard drive C by adding partitions E and L. As an example, I now have to change E, that is, I want to enlarge the partition. To do this, I either have to reduce volume L (like the tip above) or I delete it entirely.
Right click on volume L
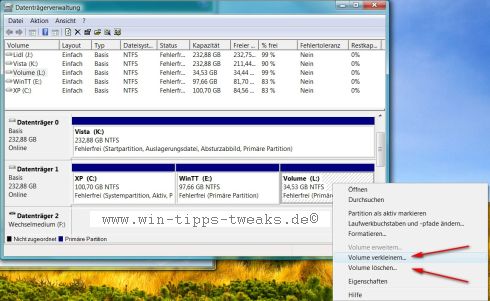
And I choose as an example ??Deletesince I have the original size on my drive WinTT (E) want to restore.
You will now be warned again! Confirmation will then confirm the Volume L deleted and there is space that is not allocated.
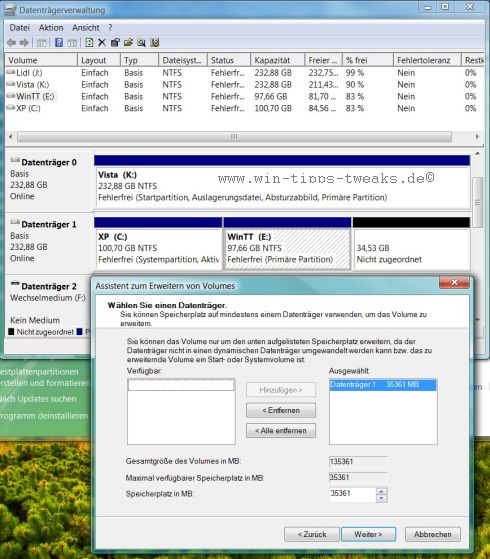
Confirmation will be the origin of my test drive WinTT (E) restored.
Finally, the following words, as some users will probably ask themselves, what does this partitioning bring me ?!
I just say one thing and that is Data Backup.
Personal data, data from application programs, backups of e-mails, personal documents and so on should always be, I always emphasize, on a separate partition, or even better on a hard drive. So you always have a possibility to restore this data in the event of a system crash. This tip was written for those users who only have the option of partitioning.
Otherwise, this partition article is also just the thing for the following tips:
So that was my tip. I hope you enjoy trying it out.
Note: Unfortunately, one has to admit that Vista has specifications when it comes to partitioning. My self-tests have shown that a maximum of half of the existing capacity of a hard disk / partition can be used to create a new partition. This in turn can then also be reduced by a maximum of half. A "Why", I haven't found anything about it yet. For users who want to use more advanced partition options under Vista, there is still an additional tool, such as Disk Director from Acronis or the free program GParted.
See also:
Partition Windows 7 system partition (enlarge / reduce)
| Transparency: | This article may contain affiliate links. These lead directly to the provider. If a purchase is made through this, we receive a commission. There are no additional costs for you! These links help us to refinance the operation of win-tipps-tweaks.de. |
This tip comes from www.win-tipps-tweaks.de
© Copyright Michael Hille
Warning:
Using Registry Editor or its tips incorrectly can cause serious system problems that may require you to reinstall your operating system. Tampering with the registry files and using the tips is at your own risk.


