With active user account control, start applications without feedback

In the long run it can be very annoying to only start certain applications after a message from the user account control. There are several ways to work around this problem. Since security shouldn't suffer as a result, it is not the aim to simply deactivate the user account control. There is a very elegant solution via the Windows 7 task scheduler, in which the application is started with administrator rights.
1. Create a simple task
To do this, you open the control Panel > Management > task Scheduler
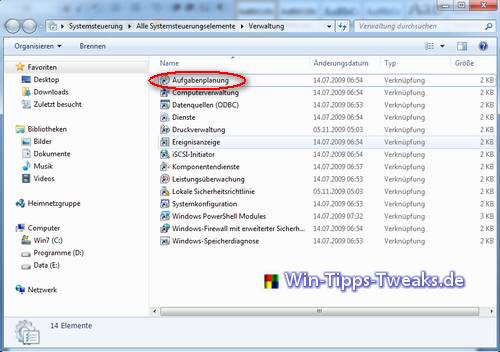
Start task planning
In the task planning, select the "Create simple task" button on the right.
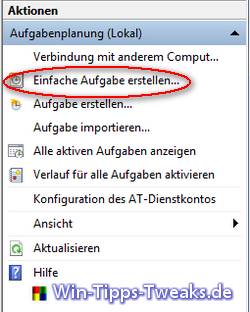
Create a simple task
In the first window of the wizard, you now enter the name of the application that is to be started later without any queries.
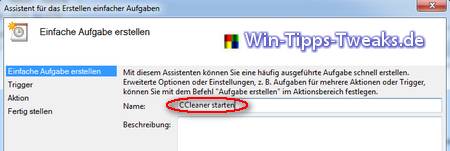
Enter the name in the wizard
In the next step the option "Once" is selected.
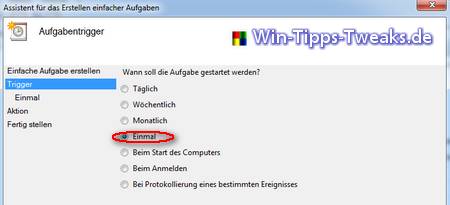
Select "Option Once"
The date and time are adopted so that the application does not run automatically.
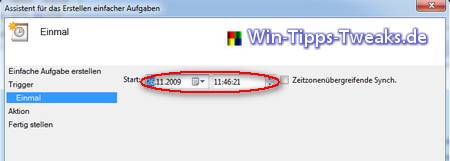
Accept "Date and Time"
"Start program" is selected under the Action menu item.
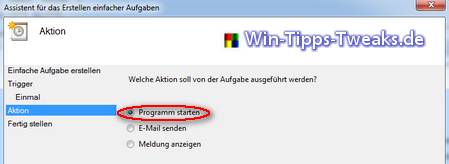
Select "Start program"
A program file must now be assigned to the application. If you do not want to search the hard drive for this, you can simply select the desired application with the right mouse button and copy the target via Properties> Shortcut and paste it in the input field.
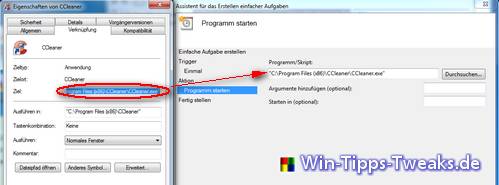
Select application
In the last window there is only a checkmark next to "When you click on Finish, open the properties for this task".
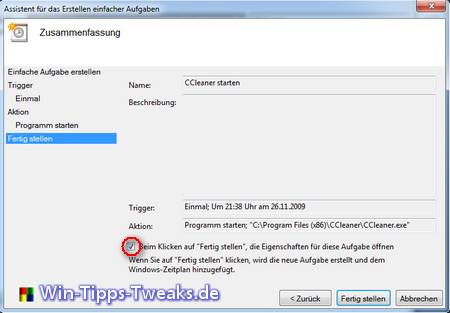
Open properties window
2. Create a link
At this point in time, the application should be started via the task management. Since this would not be a simplification, a link is now created that allows the application to start as usual. In this case, a link is created on the desktop, but it is also possible at any other point in the system.
To do this, click with the right mouse button on a free space on the desktop.
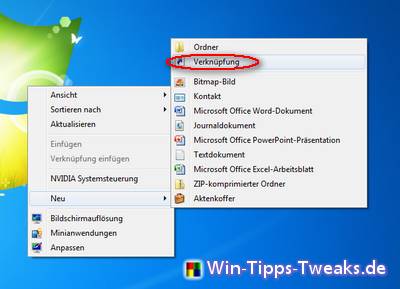
create link
The following text is now entered here:
C:\Windows\System32\schtasks.exe /run /TN
For you enter the same name that you previously assigned to the created task. If there is a space in the task name, you must enclose the entire task name in execution characters.
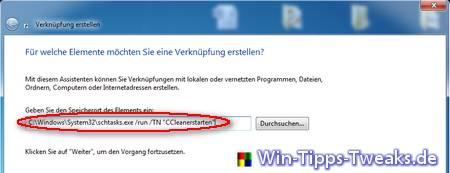
Select linking program
Now only a name has to be assigned for the link.

Enter link name
Now it's done.
Tips on the subject:
- Disable Windows 7 User Account Control (UAC)
- Set Windows 7 User Account Control
- more tips on the subject
| Transparency: | This article may contain affiliate links. These lead directly to the provider. If a purchase is made through this, we receive a commission. There are no additional costs for you! These links help us to refinance the operation of win-tipps-tweaks.de. |
This tip comes from www.win-tipps-tweaks.de
© Copyright Michael Hille
Warning:
Using Registry Editor or its tips incorrectly can cause serious system problems that may require you to reinstall your operating system. Tampering with the registry files and using the tips is at your own risk.


